Hey all!


Linking to these Fabulous Parties!
Here I go again with what I love. Pillows and really easy quick ones to make. And burlap! Duh.
Here are two Shamrock pillows that are small in size. This is what I started with for my Shamrock pillows - they are so quick and easy! {Can't get much better than that - Ya think?}


What I used:
Lion Brand Homespun Yarn {from one of the craft stores}
Green and cream colored Burlap from Hobby Lobby
Cream colored muslin I had {thinking from Hobby Lobby also}
Green DMC embroidery thread same color as yarn
A shamrock pattern
And polyester stuffing!
The cream colored burlap pillow was inspired by the Pottery Barn knock off pillow posted on The Scrap ShoppeI Her pillows are amazing! Here is my little attempt. I wanted a small {8 x 8 inch} pillow so I cut out two 9 x 9 inch burlap squares. I sketched out a Shamrock on one square Then, using my trusty Liquid Stitch, I started gluing along the outer lines of my Shamrock.

Kept going all around and around until I filled in the Shamrock. This was so easy and fast! Ha!
{Hint - since burlap is such an open weave I put wax paper under the fabric so it wouldn't adhere its cute little self to my kitchen craft table!

Let it dry then sew the two burlap pieces together . And - like you all know - left a 2 inch opening to turn the pillow right side out, stuff the rascal, then sew it shut!
You will see the end result along with my lucky pillow soon - Promise!
For the other {green burlap} pillow this is how it goes:
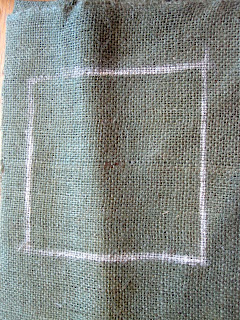
Cut out two 6 x 6 inch squares of the Forest Green burlap. {Ugh - I could not get a true picture of the green burlap. Sometimes it just ain't happening!}

On a small piece of off muslin {1 -3/4" x 3"} I stitched "happy" in a very primitive way (meaning I haven't done this in many moons and it wasn't going to be pretty} And, like I usually do, I cheated and ironed fusion on the back of this cutie pie and then ironed it straight onto the pillow. {again - putting wax paper between the layers so they wouldn't stick to each other. That would be sooooo annoying!}

Here we are all sewn, stitched, and ironed onto the small pillow!

I wanted to give it a little more finished look that didn't show how I cheated gluing instead of stitching so I hand stitched around the muslin piece. Started out with a blanket stitch but WHOA - way too much stitching! Still think I will do it different next time. But, love my lucky pillows and here's hoping they will bring luck my way! {I promise to pass it along to YOU if they do!}

My newest babies!
Wishing you and yours, Irish or not, a great St. Patrick's Day!
Linking to these Fabulous Parties!
The Shabby Nest, My Romantic Home, I Heart Naptime, French Country Cottage, Elements Interiors, Tip Junkie, Fireflies and Jellybeans, Blue Cricket Design, Paisley Passions Thrifty Decor Chick, Night Owl Crafting, Embellishing Life, , Fun To Craft, At the Picket Fence, Funky Junk Interiors, Somewhat Simple, Dittle Dattle, A Holiday Haven, Cuisine Kathleen

These are just too cute! Perfect St. Patrick's Day decorations. So very creative. Thank you so much for sharing this with us for Inspiration Friday At The Picket Fence!
ReplyDeleteHeather
Thanks so much Heather! What fun it is to part of Friday at the Picket Fence! Love it!
ReplyDeleteKara, if you didn't get my email I have linked to your fabulous Whassup Wednesday! I'm enjoying exploring both blogs and parties. Thank you thank you!
Wow you make this look so easy! Adorably done!
ReplyDeleteThese are precious Mimi! Thanks for the "how to" Happy St. Patrick's Day to you!
ReplyDeleteThe little pillows are so cute. It looks so easy to do with your instructions. Fun post.
ReplyDeleteLove your little pillows! And your painting on glass! Cute chalkboard!
ReplyDeleteThanks for coming to visit!
Such cute and festive pillows! Joni
ReplyDeleteAdorable little pillows!
ReplyDeleteHow fun and cute!! You did a wonderful job!
ReplyDeleteXO,
Janie
How cute!
ReplyDeleteVery clever! These are perfect for a touch of green to celebrate St. Paddy's Day. ~ Sarah
ReplyDeleteI love this! Thank you for the tutorial! Happy St. Patty's!
ReplyDeleteCome over to visit me at Kathleen's!
FABBY
Cute design with the two pillows together! And I don't think it would take much time, with that thick yarn and the burlap, for a needlecrafter to do a simple crewel embroidery stitch to fill in the shamrock. I just might have to give this a try before next spring! Happy St Patrick's day to you!
ReplyDeleteHello, I love the cute throw pillows you have made for St. Patrick's Day, they are so cute! I hope it's okay, I featured your pillows in a St. Patrick's Day crafts and decor round-up hub here:
ReplyDeletehttp://jamiebrock.hubpages.com/hub/St-Patricks-Day-Craft-Tutorials-and-DIY-Home-Decor-Round-Up
Thank you so much for sharing!